To make it easier for our readers to install PostgreSQL on Ubuntu, we have compiled a quick guide to getting started. Don’t worry, it’s not too hard. You will learn:
Table of Contents
Note that this is an introduction. If you are looking to create a PostgreSQL High-Availability cluster, we recommend checking out some of our other content.
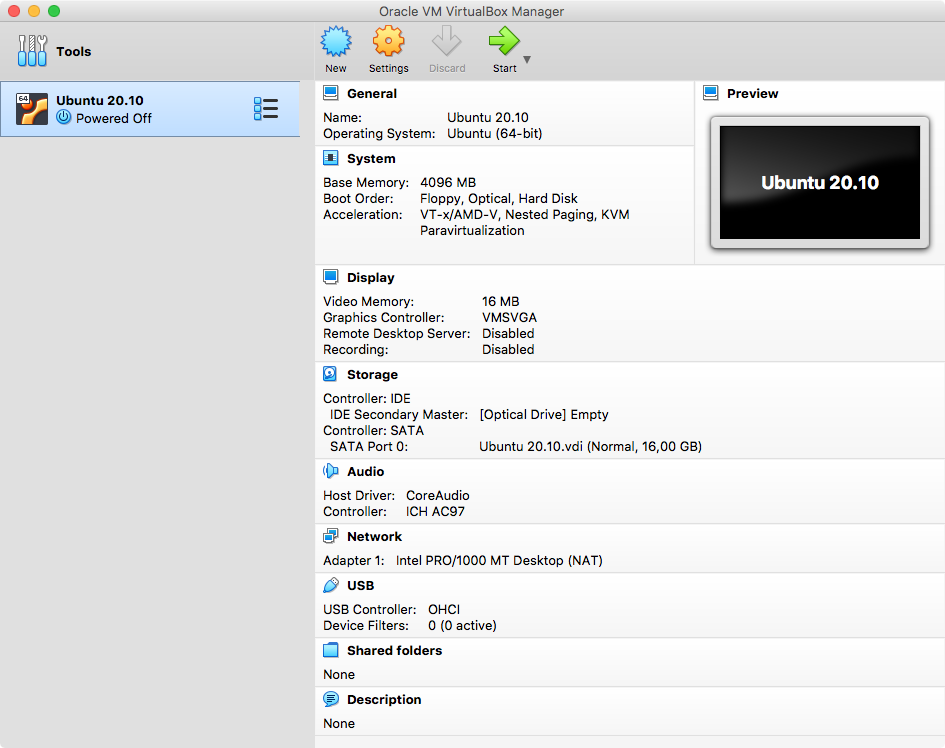
For this demonstration I have created a virtual machine using VirtualBox on my local machine. We use Ubuntu 20.10 in this tutorial.
Installing Ubuntu on VirtualBox is easy. Simply download the Ubuntu ISO file from the website and create a virtual machine:
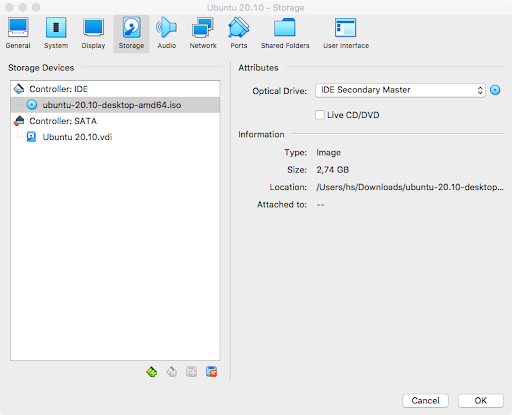
Then ensure that the ISO file is inserted into the virtual CD drive:
You can then boot the machine. Simply follow the instructions. Once Ubuntu is installed, we can proceed with the installation of PostgreSQL itself.
To download PostgreSQL, we suggest checking out the official PostgreSQL website. Those PostgreSQL packages provided by the community are high quality and we recommend using them for your deployment: https://www.postgresql.org/download/
Please select your desired operating system. In our example, I have selected the latest version of Ubuntu (20.10). The following steps are now necessary to install PostgreSQL:
The first thing you have to do is to add the repository to your Ubuntu installation. Here is how it works:
|
1 2 |
hans@cybertec:~# sudo sh -c 'echo 'deb http://apt.postgresql.org/pub/repos/apt $(lsb_release - cs)-pgdg main' > /etc/apt/sources.list.d/pgdg.list' |
Then you can add the keys to the system to make sure the repository is trustworthy:
|
1 2 3 |
hans@cybertec:~# wget --quiet -O - https://www.postgresql.org/media/keys/ACCC4CF8.asc | sudo apt-key add - Warning: apt-key is deprecated. Manage keyring files in trusted.gpg.d instead (see apt-key(8)). OK |
Next, we can update the package list and ensure that our system has the latest stuff:
|
1 2 3 4 5 6 7 8 9 |
hans@cybertec:~# apt-get update Hit:1 http://at.archive.ubuntu.com/ubuntu groovy InRelease Hit:2 http://at.archive.ubuntu.com/ubuntu groovy-updates InRelease Hit:3 http://at.archive.ubuntu.com/ubuntu groovy-backports InRelease Get:4 http://apt.postgresql.org/pub/repos/apt groovy-pgdg InRelease [16,8 kB] Hit:5 http://security.ubuntu.com/ubuntu groovy-security InRelease Get:6 http://apt.postgresql.org/pub/repos/apt groovy-pgdg/main amd64 Packages [162 kB] Fetched 178 kB in 1s (228 kB/s) Reading package lists... Done |
Once the repositories are ready to use, we can actually go and install PostgreSQL on our Ubuntu server.
Basically, all we need to do is run “apt-get -y install postgresql” This will automatically deploy the latest version of PostgreSQL. If we want to deploy, say, PostgreSQL 12 instead of the current PostgreSQL, we would use “apt-get install postgresql-12” instead.
Now let’s install PostgreSQL 13:
|
1 2 3 4 5 6 7 8 9 10 11 12 13 14 15 16 17 18 19 20 21 22 23 24 25 26 27 28 29 30 31 32 33 34 35 36 37 38 39 40 41 42 43 44 45 46 47 48 49 50 51 52 53 54 55 56 57 58 59 60 61 62 63 |
hans@cybertec:~# sudo apt-get -y install postgresql Reading package lists... Done Building dependency tree Reading state information... Done The following additional packages will be installed: libpq5 pgdg-keyring postgresql-13 postgresql-client-13 postgresql-client-common postgresql-common sysstat Suggested packages: postgresql-doc postgresql-doc-13 libjson-perl isag The following NEW packages will be installed: libpq5 pgdg-keyring postgresql postgresql-13 postgresql-client-13 postgresql-client-common postgresql-common sysstat 0 upgraded, 8 newly installed, 0 to remove and 150 not upgraded. Need to get 17,7 MB of archives. After this operation, 59,2 MB of additional disk space will be used. Get:1 http://at.archive.ubuntu.com/ubuntu groovy/main amd64 sysstat amd64 12.4.0-1 [471 kB] Get:2 http://apt.postgresql.org/pub/repos/apt groovy-pgdg/main amd64 libpq5 amd64 13.1-1.pgdg20.10+1 [175 kB] Get:3 http://apt.postgresql.org/pub/repos/apt groovy-pgdg/main amd64 pgdg-keyring all 2018.2 [10,7 kB] ... Creating config file /etc/postgresql-common/createcluster.conf with new version Building PostgreSQL dictionaries from installed myspell/hunspell packages... en_us Removing obsolete dictionary files: apt-get -y install postgresql Created symlink /etc/systemd/system/multi-user.target.wants/postgresql.service → /lib/systemd/system/postgresql.service. Setting up postgresql-13 (13.1-1.pgdg20.10+1) ... Creating new PostgreSQL cluster 13/main ... /usr/lib/postgresql/13/bin/initdb -D /var/lib/postgresql/13/main --auth-local peer --auth-host md5 The files belonging to this database system will be owned by user 'postgres'. This user must also own the server process. The database cluster will be initialized with locales COLLATE: en_US.UTF-8 CTYPE: en_US.UTF-8 MESSAGES: en_US.UTF-8 MONETARY: de_AT.UTF-8 NUMERIC: de_AT.UTF-8 TIME: de_AT.UTF-8 The default database encoding has accordingly been set to 'UTF8'. The default text search configuration will be set to 'english'. Data page checksums are disabled. fixing permissions on existing directory /var/lib/postgresql/13/main ... ok creating subdirectories ... ok selecting dynamic shared memory implementation ... posix selecting default max_connections ... 100 selecting default shared_buffers ... 128MB selecting default time zone ... Europe/Vienna creating configuration files ... ok running bootstrap script ... ok performing post-bootstrap initialization ... ok syncing data to disk ... ok Success. You can now start the database server using: pg_ctlcluster 13 main start Ver Cluster Port Status Owner Data directory Log file 13 main 5432 down postgres /var/lib/postgresql/13/main /var/log/postgresql/postgresql-13-main.log update-alternatives: using /usr/share/postgresql/13/man/man1/postmaster.1.gz to provide /usr/share/man/man1/postmaster.1.gz (postmaster.1.gz) in auto mode Setting up postgresql (13+223.pgdg20.10+1) ... ... |
The beauty of this setup is that everything was done automatically by the packages. This includes but is not limited to:
systemd configurationNow, all that remains to be done is to enable the services to ensure that the database is running correctly and automatically - in case the system is restarted.
Enabling the service is easy and can be done using the standard systemd procedure. Basically the service should already be active but it makes sense to double check to make sure that stuff is really enabled:
|
1 2 3 |
hans@cybertec:~# sudo systemctl enable postgresql Synchronizing state of postgresql.service with SysV service script with /lib/systemd/systemd-sysv-install. Executing: /lib/systemd/systemd-sysv-install enable postgresql |
Once the service has been enabled, we can start the instance so that we can use it directly, without a restart:
|
1 |
hans@cybertec:~# sudo systemctl start postgresql |
Ubuntu did not issue any errors. However, it is usually a good idea to check if the database is indeed running. There are two ways to do that:
pg_isready to check the systemFirst, let’s check the process table:
|
1 2 3 4 5 6 7 8 9 |
hans@cybertec:~# ps axf | grep postgres 58406 pts/2 S+ 0:00 _ grep --color=auto postgres 47883 ? Ss 0:00 /usr/lib/postgresql/13/bin/postgres -D /var/lib/postgresql/13/main -c config_file=/etc/postgresql/13/main/postgresql.conf 47885 ? Ss 0:00 _ postgres: 13/main: checkpointer 47886 ? Ss 0:00 _ postgres: 13/main: background writer 47887 ? Ss 0:00 _ postgres: 13/main: walwriter 47888 ? Ss 0:00 _ postgres: 13/main: autovacuum launcher 47889 ? Ss 0:00 _ postgres: 13/main: stats collector 47890 ? Ss 0:00 _ postgres: 13/main: logical replication launcher |
The second option is to use pg_isready:
|
1 2 3 4 5 |
hans@cybertec:~# su - postgres postgres@cybertec:~$ pg_isready /var/run/postgresql:5432 - accepting connections postgres@cybertec:~$ pg_isready -V pg_isready (PostgreSQL) 13.1 (Ubuntu 13.1-1.pgdg20.10+1) |
Switch to the “postgres” user, and then call pg_isready. If you want a little bit more information, you can also add the -V (verbose) flag to the end. The beauty is that pg_isready returns a POSIX compliant return code, so you can easily use it in your scripts.
After we have installed and enabled PostgreSQL on our Ubuntu system, we can check which databases there are:
|
1 2 3 4 5 6 7 8 9 10 |
postgres@cybertec:~$ psql -l List of databases Name | Owner | Encoding | Collate | Ctype | Access privileges -----------+----------+----------+-------------+-------------+----------------------- postgres | postgres | UTF8 | en_US.UTF-8 | en_US.UTF-8 | template0 | postgres | UTF8 | en_US.UTF-8 | en_US.UTF-8 | =c/postgres + | | | | | postgres=CTc/postgres template1 | postgres | UTF8 | en_US.UTF-8 | en_US.UTF-8 | =c/postgres + | | | | | postgres=CTc/postgres (3 rows) |
“psql -l” connects to the database and lists the databases in our PostgreSQL cluster. This works perfectly - so we can already log in, and easily create a new database:
|
1 2 3 4 5 6 7 |
postgres@cybertec:~$ psql postgres psql (13.1 (Ubuntu 13.1-1.pgdg20.10+1)) Type 'help' for help. postgres=# CREATE DATABASE test; CREATE DATABASE postgres=# c test You are now connected to database 'test' as user 'postgres' |
PostgreSQL is now ready for action. You can already go ahead and use the system according to your needs. If you want to tune your database and find good configuration parameters, we recommend checking out the PostgreSQL configuration tool (pgconfigurator). It will help you to achieve better performance by adjusting some key parameters in the postgresql.conf configuration file.
If you want to improve your database setup even more, we recommend checking out a way to cluster PostgreSQL to achieve higher availability. We have compiled a post for you showing how HA can easily be achieved. Check it out.
thank you for this instructional!
Just FYI:
For the command,
su - postgresI had to putsudoin front of it first.Without
sudo,su - postgresasks me for a password.