In this post, we want to give you a brief introduction to TLS (Transport Layer Security), which is a technology widely used in combination with PostgreSQL to encrypt client / server connections.
TLS is short for "Transport Layer Security", which is a means of making sure that whatever data you are sending via TCP connections is secured against attackers.
To understand how TLS works, you first need to understand a few things about encryption.

If you have a text "I like cheese" and replace every character with the next one in the English alphabet (replacing a with b, b with c, ... and z with a), you have basic symmetric encryption. You can transfer the message "j mjlf diddtf" to your friend, and they can go through the message and replace every character with the preceding one (replacing b with a, c with b, ... and a with z), and they'll know your favourite snack.
if enc(x, k)=e is the function that encrypts x, using key k, into e, then the inverse function enc^-1(e, k)=x is used to decrypt e, using k, back into x.
This is an extremely simplified example, and easy to crack. There are way more sophisticated ways of encrypting data symmetrically, which cannot be cracked unless you know the key. A well-known example of symmetric encryption is the Enigma machine, used during the second World War. While the enigma (III) encryption was crackable for the later part of World War Two, the more advanced enigma (IV) is still difficult to crack, even to this day.
On one hand, you’ll need many different keys (one for each connection, essentially), so client B cannot decrypt whatever the server was sending to client A, for example. On the other hand, there is no simple way of securely communicating the key itself to new clients.
This is not an issue when you're managing two servers that talk to each other, because they both are trusted to a high degree and connections do not change that often. Your clients (over whose hardware and software you have little control) can not be trusted to the same degree, and new ones might be added regularly.
Thus, for the clients to be able to send and receive encrypted messages, you need something different.

At the basis of Asymmetric Encryption is the principle of private and public keys, which together are called a key pair. Both are usually derived from the same set of random numbers, and while the public key can be used to encrypt data, only the private key can be used to decrypt it again.
This means that you can hand your public key out to anyone so that they can encrypt what they want to send to you, and only you will be able to decrypt it with the private key.
Mathematically, asymmetric encryptions can be expressed like this:
if enc(x, k_pub)=e is the function that encrypts x, using public key k_pub, into e,
then the function dec(e, k_priv)=x is used to decrypt e, using private key k_priv, back into x.
Just as with symmetric encryption, there are asymmetric encryptions that are less secure than others, but we don't need to concern ourselves with that right now.
What counts is that we have a way of sending encrypted data without having to trust the client with our secret key.
Another benefit of asymmetric encryption is that it can not only be used for encryption but also to affix a signature to data. The sender can calculate a checksum of the data and encrypt it with their private key to generate a signature. The recipient calculates the checksum on the same data and compares this to the sender's checksum, which was decrypted from the signature using the public key.
TLS uses a mixture of asymmetric and symmetric encryption. Remember that symmetric encryption ideally needs different keys for every connection and that the key exchange is difficult to do securely. But at the same time, symmetric encryption is much easier (i.e. faster, cheaper) to compute compared to asymmetric encryption, and still provides similar security.
So asymmetric encryption is only used for the initial handshake, to derive or exchange a random key that will be used for symmetrically encrypting the remainder of the connection.
When you’re visiting a website from your computer, the first approach is usually used, since you don’t have to have a key pair to visit HTTPS-encrypted websites.
If you already know the public key for a given server, then you can challenge them to test if they indeed have the matching private key. Using the known public key, you can encrypt a random message and send it to the server, asking it to decrypt that for you. If the known public key matches the private key installed in the server, then the decrypted message sent back by the server will also match the random message that you initially encrypted.
This means that you can trust the server to be authentic - otherwise, it should not be in possession of the private key matching the public key that you already know. This is how the known_hosts file for ssh works.
There is, however, another way of authenticating the other party. When you're browsing the web, you do not have a list of known public keys for each server on the internet.
So, upon first connection, the server sends you its public key. But how can you be sure that this key actually belongs to the server that you're expecting? After all, you could be trying to access www.myimaginarydomain.com and an attacker diverts your calls to their own server.
the operator of www.myimaginarydomain.com can use a public key that has been signed by a private key, whose public key is already installed on your system. These public keys are called "certification authority" (CA) certificates. Sometimes it is more complicated though, as the CA certificates themselves are almost never used to directly sign "end-user" certificates, but rather used to sign intermediary certificates, and it is possible to validate the whole chain.
For example, the certificate for www.myimaginarydomain.com might be signed by "Imaginary Corporation CA", which might be signed by "Imaginary Global Trust Corporation". If the Certificate of "Imaginary Global Trust Corporation" is part of your systems' or browsers' certificate store, then the certificate delivered by the server www.myimaginarydomain.com will be trusted by your system.
In the end, a connection will only be trusted if the other parties' address matches the address contained in the certificate. If www.myimaginarydomain.com uses a certificate intended for www.notmyimaginarydomain.com, no connection will be established.
While it is easy to think of everything that we've just talked about as public and private key pairs - and in fact, it is nothing more than that, except for a little bit of metadata and signatures - there are certain terms that are frequently used in the context of TLS.
If you want to learn more about security, we recommend checking out our practical content about configuring client / server encryption in PostgreSQL using SSL.
Sometimes it is necessary to fully encrypt an entire PostgreSQL instance. PostgreSQL Transparent Data Encryption (TDE) can do exactly that, and we recommend checking it out to make your application’s backend even more secure.
Many might have seen PostgreSQL issue the following error message: "ERROR: deadlock detected". But what does it really mean? How can we prevent a deadlock and how can we reproduce the problem? Let’s dive into PostgreSQL locking and understand what deadlock and deadlock_timeout really mean.
Many people approach us because they want to understand what a deadlock is and how it can happen. They also want to understand how a deadlock can be avoided and what software developers can do about it.
If you want to understand how a deadlock occurs, all you need is a table containing two lines. That’s sufficient to explain the basic principle of deadlocks.
Here is some easy-to-use sample data:
|
1 2 3 4 5 6 7 8 9 10 |
test=# CREATE TABLE t_data (id int, data int); CREATE TABLE test=# INSERT INTO t_data VALUES (1, 100), (2, 200); INSERT 0 2 test=# TABLE t_data; id | data ----+------ 1 | 100 2 | 200 (2 rows) |
The crux is that if data is updated in a different order, transactions might have to wait for one another to be finished. It is perfectly fine if transaction 1 has to wait for transaction 2. But what happens if transaction 1 has to wait for transaction 2 and transaction 2 has to wait for transaction 1? In that case, the system has two choices:
As waiting infinitely is not an option, PostgreSQL will abort one of these transactions after some time (deadlock_timeout). Here is what happens:
| Transaction 1 | Transaction 2 | Comment |
BEGIN; | BEGIN; | |
UPDATE t_data | UPDATE t_data | works perfectly |
UPDATE t_data | has to wait until transaction 2 releases the lock on the row containing id = 2 | |
| … waits ... | UPDATE t_data | wants to lock the row locked by transaction id: now both are supposed to wait |
| … deadlock timeout ... | … deadlock timeout ... | PostgreSQL waits (deadlock_timeout) and triggers deadlock detection after this timeout (not immediately) |
| update proceeds: “UPDATE 1” | ERROR: deadlock detected | a transaction has to die |
| COMMIT; | the rest commits normally |
The error message we will see is:
ERROR: deadlock detected

DETAIL: Process 70725 waits for ShareLock on transaction 891717; blocked by process 70713.

Process 70713 waits for ShareLock on transaction 891718; blocked by process 70725.

HINT: See server log for query details.

CONTEXT: while updating tuple (0,1) in relation "t_data"
The reason is that transactions have to wait for one another. If two transactions are in a conflict, PostgreSQL will not resolve the problem immediately, rather it will wait for deadlock_timeout and then trigger the deadlock detection algorithm to resolve the problem.
Why does PostgreSQL wait for some time before it steps in and fixes things? The reason is that deadlock detection is quite expensive, and therefore not immediately triggering it makes sense. The default value here is 1 second, which is high enough to avoid pointless deadlock detection attempts, but is still short enough to fix the problem in a useful and timely manner.
The most important thing to know is: There is NO MAGIC CONFIGURATION PARAMETER to fix this problem. The problem does NOT depend on configuration. It depends on the execution order of operations. In other words, you cannot magically fix it without understanding the application and its underlying operations.
The only thing that can fix the problem is to change the execution order, as shown in the next listing:
|
1 2 3 4 5 6 |
test=# SELECT * FROM t_data ; id | data ----+------ 1 | 1000 2 | 2000 (2 rows) |
This is the data you should see after committing the transaction that did not fail before. Thus we can see what happens if two transactions execute in a different order:
| Transaction 1 | Transaction 2 | Comment |
BEGIN; | ||
UPDATE t_data | BEGIN; | |
UPDATE t_data | ||
UPDATE t_data | … wait … | |
COMMIT; | … wait … | |
UPDATE t_data | re-read the value and use the newly committed entries | |
UPDATE t_data | re-read the value and use the newly committed entries | |
COMMIT; |
In this case, there is no deadlock. However, in a real work scenario it is hardly possible to simply swap the execution order. That’s why this is more of a theoretical solution to the problem than a practical one. However, there are no other options to fix the problem of deadlocks. In the case of deadlocks, being aware of how to prevent them is the best cure.
Locking is really important. Deadlocks are not the only concern in this area. Performance might be equally important, therefore it makes sense to deal with performance-related locking effects as well. Stay tuned for more on this topic.
If you want to learn more about important features of PostgreSQL, you might want to check out a blog post about UPDATE which can be found here.
Please leave your comments below. In order to receive regular updates on important changes in PostgreSQL, subscribe to our newsletter, or follow us on Facebook or LinkedIn.
In this article, I'll talk about row level triggers, which are the most frequently used kind of triggers. I will describe what the return value of the trigger function means and suggest a useful code simplification.
A trigger in PostgreSQL consists of two parts:
This architecture has the advantage that trigger functions can be reused: triggers on different tables can use the same trigger function.
PostgreSQL has event triggers and triggers that get activated by data modifications. We will only consider the latter in this article.
There are statement level triggers (FOR EACH STATEMENT), but we will focus on the more common row level triggers (FOR EACH ROW). For such triggers, the trigger function runs once per modified table row.
Furthermore, triggers can run BEFORE, AFTER or INSTEAD OF the data modification that triggers it. INSTEAD OF triggers must be row level triggers on views.
Trigger functions are always declared as “RETURNS trigger”, but what you actually have to return is
The return value is ignored for row level AFTER triggers, so you may as well return NULL in that case. That leaves row level BEFORE triggers as the only interesting case.
In row level BEFORE triggers, the return value has the following meaning:
INSERT and UPDATE triggers, the returned row is the input for the triggering DML statementNote also that you can have more than one row level BEFORE trigger on a table. In this case, the triggers are executed in the alphabetical order of their name, and the result of the previous trigger function becomes the input for the next trigger function.
NEW and OLD in row level triggersThe special variables NEW and OLD in a row level trigger function contain the new and the old row version. They can be modified and used in the RETURN statement.
Note that NEW is NULL in ON DELETE triggers and OLD is NULL in ON INSERT triggers.
| trigger invocation | NEW is set |
OLD is set |
|---|---|---|
ON INSERT |
✓ | |
ON UPDATE |
✓ | ✓ |
ON DELETE |
✓ |
We want to capture data modifications to a table mytab in mytab_hist:
|
1 2 3 4 5 6 7 8 9 10 11 12 13 |
CREATE TABLE mytab ( id bigint GENERATED ALWAYS AS IDENTITY NOT NULL, val text ); CREATE TABLE mytab_hist ( mod_time timestamp with time zone DEFAULT clock_timestamp() NOT NULL, operation text NOT NULL, id bigint NOT NULL, val text, PRIMARY KEY (id, mod_time) ); |
Here we assume that id will never change; otherwise we would have to come up with something more complicated.
The trigger definition will look like
|
1 2 3 |
CREATE TRIGGER mytab_hist BEFORE INSERT OR UPDATE OR DELETE ON mytab FOR EACH ROW EXECUTE FUNCTION mytab_hist(); |
A possible trigger function could look like:
|
1 2 3 4 5 6 7 8 9 10 11 12 13 14 15 |
CREATE FUNCTION mytab_hist() RETURNS trigger LANGUAGE plpgsql AS $$BEGIN IF TG_OP = 'DELETE' THEN INSERT INTO mytab_hist (operation, id, val) VALUES (TG_OP, OLD.id, NULL); RETURN OLD; ELSE INSERT INTO mytab_hist (operation, id, val) VALUES (TG_OP, NEW.id, NEW.val); RETURN NEW; END IF; END;$$; |
TG_OP contains the triggering event (INSERT, UPDATE, DELETE or TRUNCATE).
Note how similar the code for both branches of the IF statement is. It would be nice to simplify that. Indeed the coalesce function makes it possible to write the same function in a much simpler fashion:
|
1 2 3 4 5 6 7 8 |
CREATE OR REPLACE FUNCTION mytab_hist() RETURNS trigger LANGUAGE plpgsql AS $$BEGIN INSERT INTO mytab_hist (operation, id, val) VALUES (TG_OP, coalesce(NEW.id, OLD.id), NEW.val); RETURN coalesce(NEW, OLD); END;$$; |
coalesce will return the first of its arguments that is not NULL. This does exactly the right thing in our case, because NEW is NULL in ON DELETE triggers.
Instead of writing complicated conditional code for the return value of a row level trigger, resort to the simple
|
1 |
RETURN coalesce(NEW, OLD); |
which is almost always the right thing.
If you want to know more about triggers, you may want to read my article about constraint triggers.
By Kaarel Moppel
I don’t usually post about upcoming PostgreSQL features and rather concentrate on tools available / versions released... but this feature, pg_read_all_data, got me excited and will certainly be a huge relief for real-life usage, especially for beginners! I had almost lost hope we might see this day - but after many years of wishing for it, one of the features most requested by normal business users/application developers has landed in the repository. Kudos to the author and reviewer!
|
1 2 3 4 5 6 7 8 9 10 |
commit 6c3ffd697e2242f5497ea4b40fffc8f6f922ff60 Author: Stephen Frost <sfrost@snowman.net> Date: Mon Apr 5 13:42:52 2021 -0400 Add pg_read_all_data and pg_write_all_data roles …. Reviewed-by: Georgios Kokolatos Discussion: https://postgr.es/m/20200828003023.GU29590@tamriel.snowman.net |
Full Git commit entry here.
In a perfect world, no one would require such convenience functionality - given, of course, that everyone knew more or less exactly how their data model was going to look like, could predict how it was going to be used, and more importantly, who was going to use it, and designed the access/privilege system accordingly. Sadly, we sometimes have to live and deal with the real world where we mostly don’t have the time and resources to work out perfect solutions — so there’s a healthy number of question marks hovering around every decent-sized project, to say the least.
Then again, it’s true that for years, we have managed to get by without this new feature. But often what we see happening is that database operators cannot foresee and nicely accommodate all future data access requirements... and in many cases, they fix the situation with the hefty price tag of handing out potentially dangerous superusers access!
If you’re new(ish) to Postgres you might think here - hmm, how bad can it be? All our data analysts have been superusers for years, and nothing bad happened? Sure, I get it, most of the time nothing bad happens... but nevertheless, you will have a constant “cloud of danger” hovering around your database with too generous superuser usage. Even if your data is nicely backed up or just plain not too important, a mean superuser can take over the whole database server by executing random commands on the OS level! And this my friends is a feature, not a bug. From there, the next step could be infiltrating the whole company-wide network and stealing all valuable assets, or locking you out of your business, to risk drawing an even darker picture…
To read more on those scary superuser side-effects I suggest reading this article.
Well, it couldn't be much simpler - just hand out the required GRANT (pg_read_all_data or pg_write_all_data) to a trustworthy user of choice and voila! ????
NB! You yourself still need to be a superuser. Note that I’m only demonstrating the “read all” use-case here, as that will be the more common one.
|
1 2 3 4 5 6 7 8 9 10 11 12 13 14 15 16 17 18 19 20 21 22 23 24 25 26 27 28 29 30 31 32 33 34 35 |
## NB! Assuming logged in as superuser on a devel build # Let’s first create a test table CREATE TABLE data (data jsonb); # And a plain mortal login user called “bob” CREATE USER bob; # Let’s verify that Bob has no privileges to the “data” table. # NB! This is a “psql” command, not SQL... dp+ data Access privileges Schema | Name | Type | Access privileges | Column privileges | Policies --------+------+-------+-------------------+-------------------+---------- public | data | table | | | (1 row) # Let’s a test row INSERT INTO data SELECT '{'hello': 'world'}'; # And try to look at it as Bob SET ROLE TO bob; /* acting as Bob from now on … */ SELECT * FROM data; ERROR: permission denied for table data # Time to check out that new functionality… RESET ROLE; /* back to superuser again */ GRANT pg_read_all_data TO bob; # Let’s try again as Bob SET ROLE TO bob; # Voila... SELECT * FROM data; data -------------------- {'hello': 'world'} (1 row) |
The change was committed and is upcoming... but sadly it will still take many months before the next major version (v14) is released - so how can you implement the “read all data” / “write all data” requirement with the means currently available? There are a couple of options:
ALTER DEFAULT PRIVILEGES syntax. This is the cleanest and most highly recommended method. Basically, you could have an appdb_reader meta-role that gets a SELECT automatically granted for every table that will be created in the future, and then you could just assign this role to a trustworthy/needed real (login) user. So something along the lines of:|
1 2 3 4 5 6 7 8 9 10 11 12 13 14 15 16 |
CREATE ROLE appdb_reader; CREATE ROLE data_analyst_role IN ROLE appdb_reader; CREATE USER alice; GRANT data_analyst_role TO alice; -- NB! You need to do this for all schemas! ALTER DEFAULT PRIVILEGES IN SCHEMA public GRANT SELECT ON TABLES TO appdb_reader; CREATE TABLE data(id INT); SET ROLE TO alice; /* Should work automagically... */ TABLE data; |
|
1 |
GRANT SELECT ON ALL TABLES IN SCHEMA public TO appdb_reader; |
pg_hba.conf level. In that way, a malicious (or hacked) user won’t pose an OPSEC threat. Note that for heavy read queries you might also need to tune some configuration parameters still, to avoid replication conflicts - see here for details in case needed.If you would like to learn more about PostgreSQL’s role and privilege system, I’d suggest looking at some articles here and here, and at the official documentation here.
There’s not much to conclude here about this new feature, since it’s dead simple to use (given you don’t have to worry too much about some secret tables), so I will leave you with just a small remark: with this newly added feature, you can end up with a non-optimal database design. For that reason, make sure to understand the implications of its use, and please do still try to use the good old role system for more complex projects. Having more granular access at your disposal in an enterprise context can mean the difference between handing out a simple GRANT vs expensive redesign of the whole database schema!
I hope this feature will result in far fewer unnecessary superuser roles being handed out. All in all, it’s yet another great reason to become an “elephant herder”, if you aren’t doing that already. ????
PostgreSQL allows end users to store BLOBs (binary large objects) in the database. Many people use these functions to handle data directly in SQL. There has long been a discussion about whether this is a good thing or not. We expect that particular discussion to go on indefinitely. However, if you are in the “pro BLOB” camp, we want to share some insights into how binary data can be handled in PostgreSQL with maximum efficiency.
BLOBs are important: to show how they work, I have created a file which we can import into the database later on:
|
1 |
iMac:~ hs$ echo abcdefgh > /tmp/file.txt |
To import this file, we can call the lo_import function and pass the name of the file you want to load (as superuser). Here is how it works:
|
1 2 3 4 5 |
test=# SELECT lo_import('/tmp/file.txt'); lo_import ----------- 98425 (1 row) |
What we see here is that PostgreSQL gives us a number (= object ID). Note that the filename has “vanished”, so you have to store it somewhere if you want to remember those values. The way to do this is to create a basic table:
|
1 2 3 4 5 6 7 8 |
test=# CREATE TABLE t_file (name text, oid_number oid); CREATE TABLE test=# INSERT INTO t_file VALUES ('/tmp/file.txt', lo_import('/tmp/file.txt')) RETURNING *; name | oid_number ---------------+------------ /tmp/file.txt | 98432 (1 row) |
PostgreSQL gives you the option of using the OID data type to store object IDs. Storing the filename is easy - a text or varchar column will do the job, in case the path is needed later on. In general, the large object is totally independent of the file in the filesystem - it has nothing to do with it. Storing the filename is therefore merely done in order to remember what we imported.
However, don’t let’s worry about a single file. Let’s import it a million times, and see what happens:
|
1 2 3 4 5 6 7 8 9 10 11 12 13 14 15 16 17 |
test=# INSERT INTO t_file SELECT '/tmp/file.txt', lo_import('/tmp/file.txt') FROM generate_series(1, 1000000); INSERT 0 1000000 test=# TABLE t_file LIMIT 10; name | oid_number ---------------+------------ /tmp/file.txt | 98432 /tmp/file.txt | 98433 /tmp/file.txt | 98434 /tmp/file.txt | 98435 /tmp/file.txt | 98436 /tmp/file.txt | 98437 /tmp/file.txt | 98438 /tmp/file.txt | 98439 /tmp/file.txt | 98440 /tmp/file.txt | 98441 (10 rows) |
The file has been imported nicely. Each file has a new object ID, as shown in the previous listing.
Now that you have seen how to import data, we can take a look at the internals to figure out how data is stored behind the scenes. The way PostgreSQL handles things is by adding the data to pg_largeobject:
|
1 2 3 4 5 6 7 8 9 |
test=# d pg_largeobject Table 'pg_catalog.pg_largeobject' Column | Type | Collation | Nullable | Default --------+---------+-----------+----------+--------- loid | oid | | not null | pageno | integer | | not null | data | bytea | | not null | Indexes: 'pg_largeobject_loid_pn_index' UNIQUE, btree (loid, pageno) |
The “loid” contains the object ID we have stored in our table. The real data is stored as a “bytea” (byte array) column. Since some files might be really large, PostgreSQL breaks them up into chunks.
Byte array fields are easy to display. However, in the default setting it is not really human readable (which is pointless anyway, because we are talking about binary data). I have imported some text in my example, so the “escape” format is a bit more readable:
|
1 2 3 4 5 6 7 |
test=# SET bytea_output TO escape; SET test=# SELECT * FROM pg_largeobject WHERE loid = 98437 ORDER BY pageno; loid | pageno | data -------+--------+-------------- 98437 | 0 | abcdefgh\012 (1 row) |
What we see here is that the BLOB interface is really a wrapper around the “bytea” data type. That is the real magic.
Now let’s move on to deleting BLOBs again. The way to do that is to call the “lo_unlink” function. It will remove the entry from the system catalog:
|
1 2 3 4 5 |
test=# SELECT lo_unlink(98432); lo_unlink ----------- 1 (1 row) |
Removing a simple entry will be easy. However, let’s try to answer the following question: What happens when millions of BLOBs are removed from the system within the very same transaction?
Running the deletion is straightforward. The result, on the other hand, is fairly unexpected:
|
1 2 3 4 5 6 7 |
test=# BEGIN; BEGIN test=*# SELECT lo_unlink(oid_number) FROM t_file ; ERROR: out of shared memory HINT: You might need to increase max_locks_per_transaction. test=!# ROLLBACK; ROLLBACK |
PostgreSQL is not able to run the transaction because we have run out of memory! How can that happen? When a large object is deleted, it has to be locked. The trouble is that the number of locks in shared memory is limited.
NOTE: Please bear in mind that row locks
are NOT stored in shared memory. This is
only true for objects (table locks, etc.)
As a result, we are running out of memory. The main question now becomes: How many locks can we store? The answer can be found within three config variables (these are located in postgresql.conf):
|
1 2 3 4 5 6 7 8 9 10 11 12 13 14 15 16 17 |
test=# SHOW max_locks_per_transaction; max_locks_per_transaction --------------------------- 64 (1 row) test=# SHOW max_connections; max_connections ----------------- 100 (1 row) test=# SHOW max_prepared_transactions; max_prepared_transactions --------------------------- 0 (1 row) |
The number of locks available is:
|
1 2 |
number_of_locks = max_locks_per_transaction * (max_connections + max_prepared_transactions). |
So in my case it is 6.400. In short, there is no way we can handle these deletions in one transaction.
Basically, we’ve got two ways to solve this problem:
Those are the only ways we can get rid of those BLOBs in the database.
Sometimes, BLOBs are lost because the reference to the OID goes missing, but the object itself is not unlinked. In this case, a command line tool is available:
|
1 2 3 4 5 6 7 8 9 10 11 12 13 14 15 16 17 18 19 |
iMac:~ hs$ vacuumlo --help vacuumlo removes unreferenced large objects from databases. Usage: vacuumlo [OPTION]... DBNAME... Options: -l, --limit=LIMIT commit after removing each LIMIT large objects -n, --dry-run don't remove large objects, just show what would be done -v, --verbose write a lot of progress messages -V, --version output version information, then exit -?, --help show this help, then exit Connection options: -h, --host=HOSTNAME database server host or socket directory -p, --port=PORT database server port -U, --username=USERNAME user name to connect as -w, --no-password never prompt for password -W, --password force password prompt |
vacuumlo will look for unreferenced large objects and delete them. This is a good way to clean a database, in case your application is buggy or something bad happens.
If you are struggling with BLOBs, we want to point out that we offer PostgreSQL consulting as well as 24x7 database support. Our highly professional team can definitely help you with your BLOB-related problems. Contact us.
If you want to learn about the latest PostgreSQL tips and tricks, consider checking out this blogpost.
In order to receive regular updates on important changes in PostgreSQL, subscribe to our newsletter, or follow us on Facebook or LinkedIn.
Visualizing spatial data is an important task. In this mini-tutorial, you will learn how to quickly visualize OpenStreetMap (OSM) data with PostGIS and QGIS. The idea is to get you started as fast as possible, and to make the most out of your data.
QGIS is freely available as Open Source software and can be used free of charge. It is a powerful tool to edit and visualize spatial data which is ideally stored in a PostGIS-enabled PostgreSQL database.
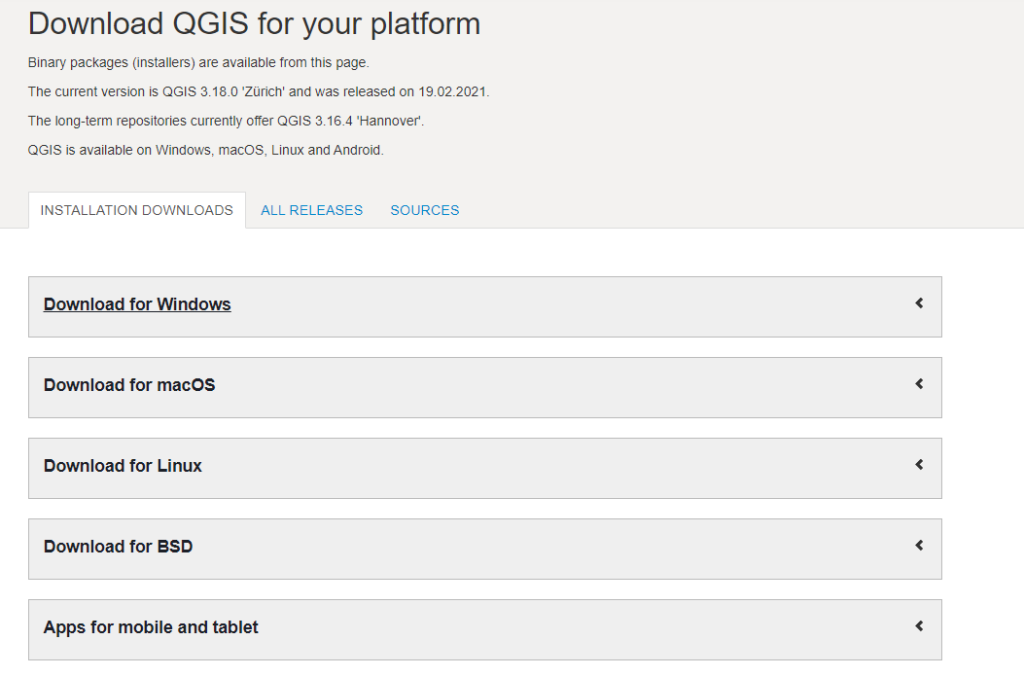
First, download QGIS from the official website.
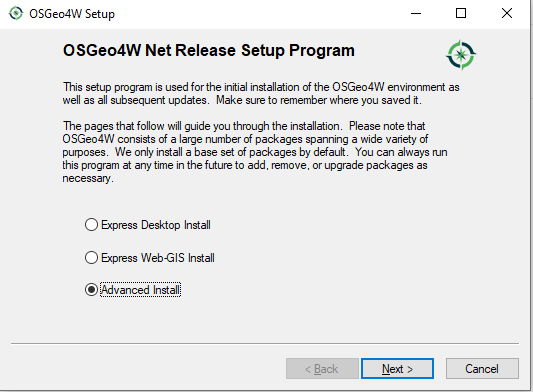
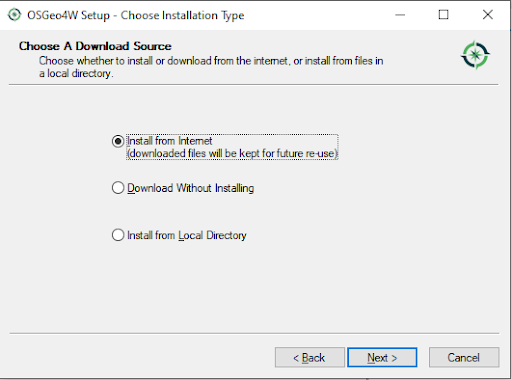
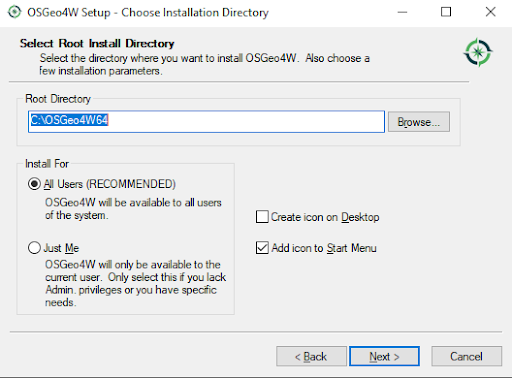
Once the package has been downloaded, you can simply follow the installation instructions. The following gallery shows how this works. Installing QGIS should be relatively easy.

The next thing we have to do is to install PostgreSQL and to load OpenStreetMap (OSM) data. There are various ways to load OSM data. Many people use osm2pgsql, which has become pretty popular over the years. If you want to learn more about loading OSM data into a PostgreSQL database, please check out Florian Nadler’s excellent OSM / PostgreSQL tutorial dealing with this issue.
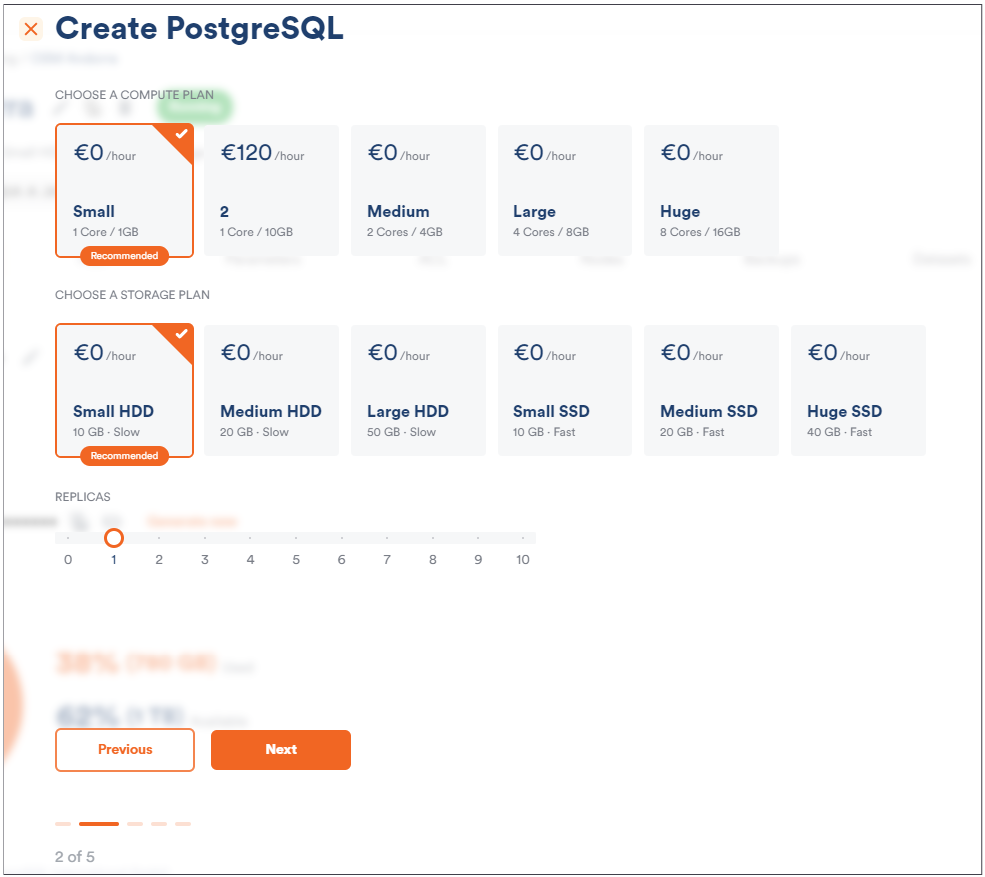
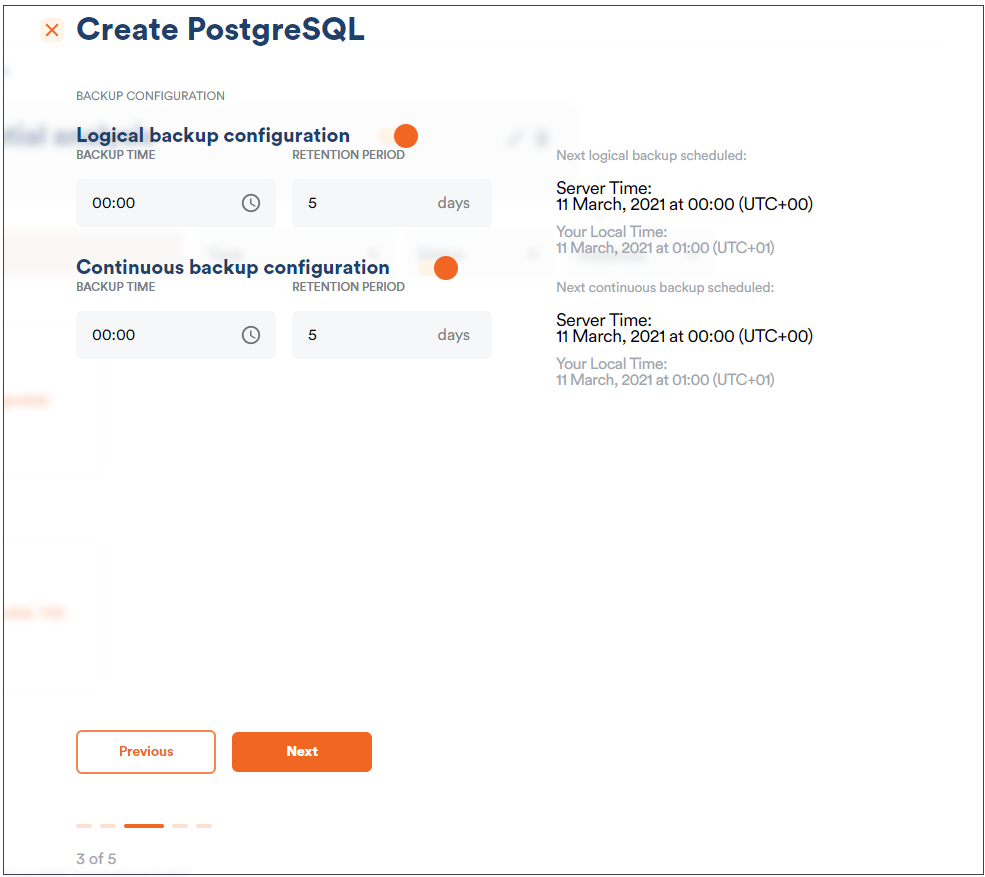
Since we want to primarily focus on QGIS-related questions here, I have used Scalefield to create a small PostgreSQL instance and to load OSM data directly. Scalefield comes with a built-in mechanism to populate data sets directly during the provisioning process of your PostgreSQL service, as shown in the next gallery.
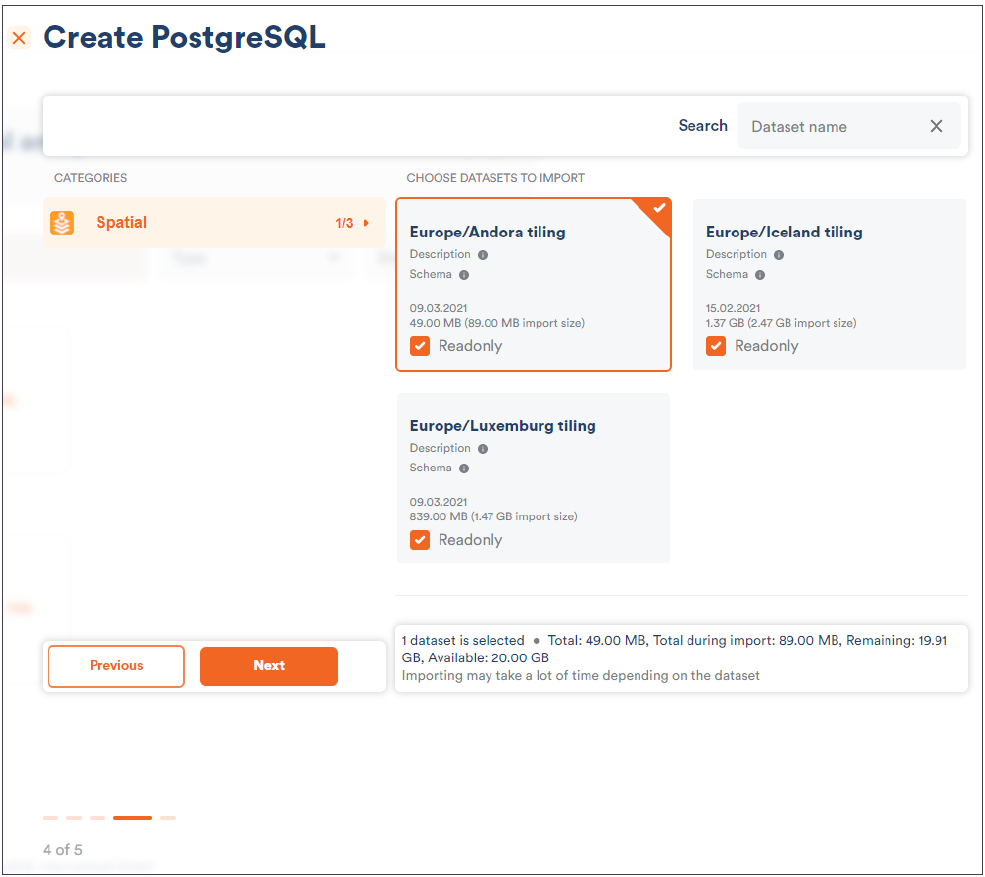
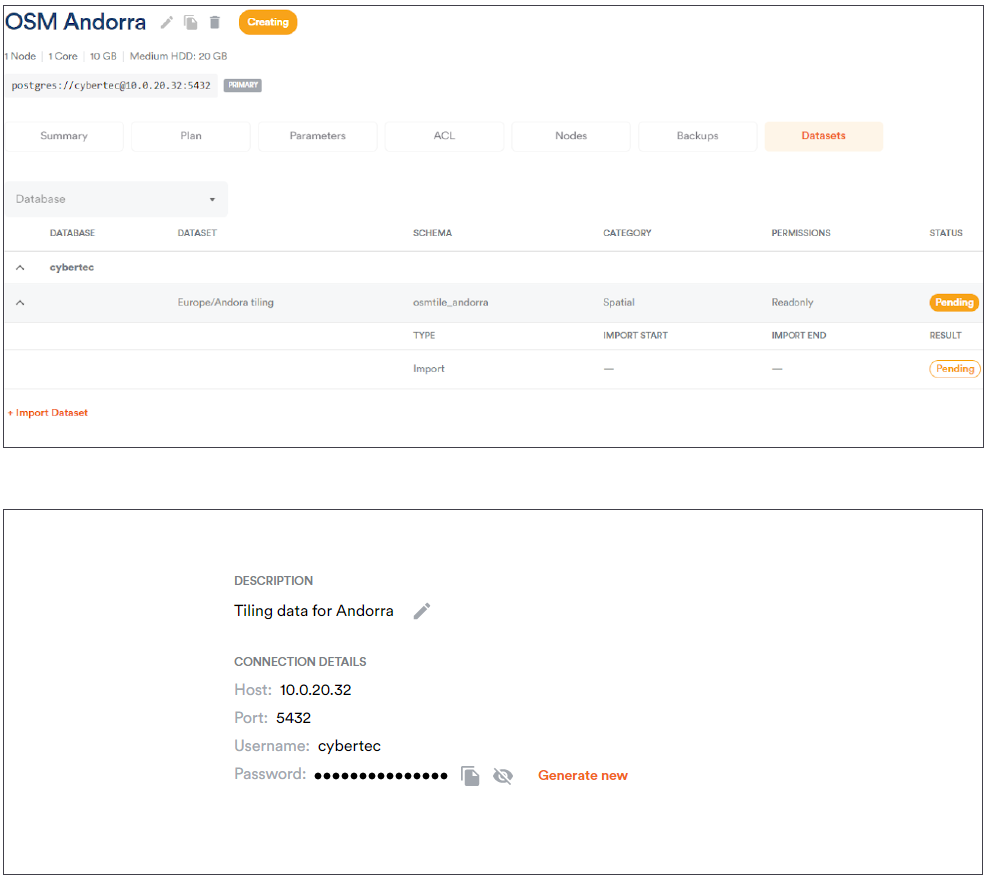
Make sure that you have deployed your desired OpenStreetMap data. In my example, I simply loaded OSM data for Andorra because it is the quickest way to get started. However, any other data set will serve the same purpose.
If you want to use QGIS to visualize your spatial data, the first thing is to define the database connection you want to use. Click on “Create a New PostGIS connection” and fill out the connection data in the form which pops up.
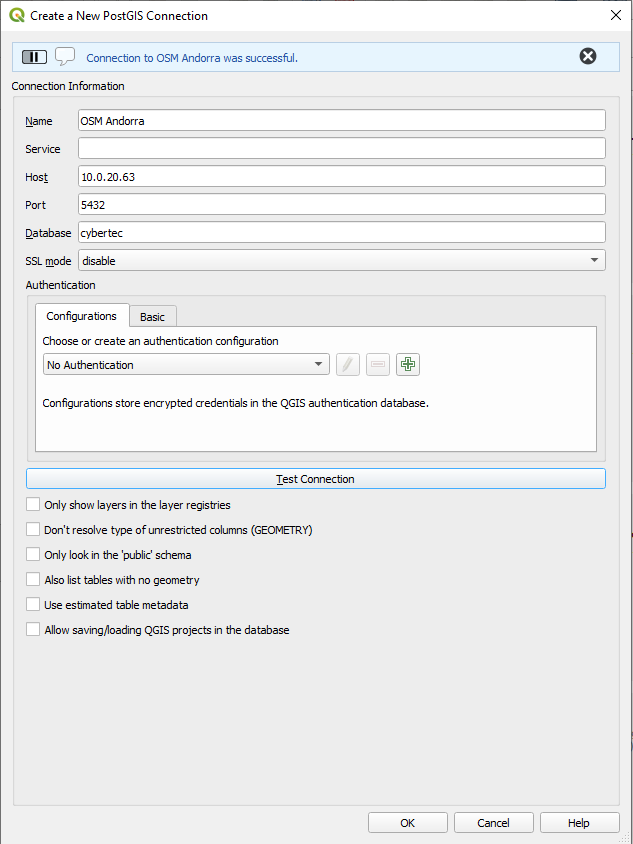
The beauty here is that QGIS allows you to immediately verify the database connection to ensure that the connection works smoothly later on.
The core concept we are looking at here is the idea of a “layer”. A map is not usually made out of a simple column, but consists of various types of information all put into a single image. In our case we want to use columns from all four OSM tables. We can select the Andorra data set on the left side and mark those columns. QGIS will visualize the selected data for us immediately.
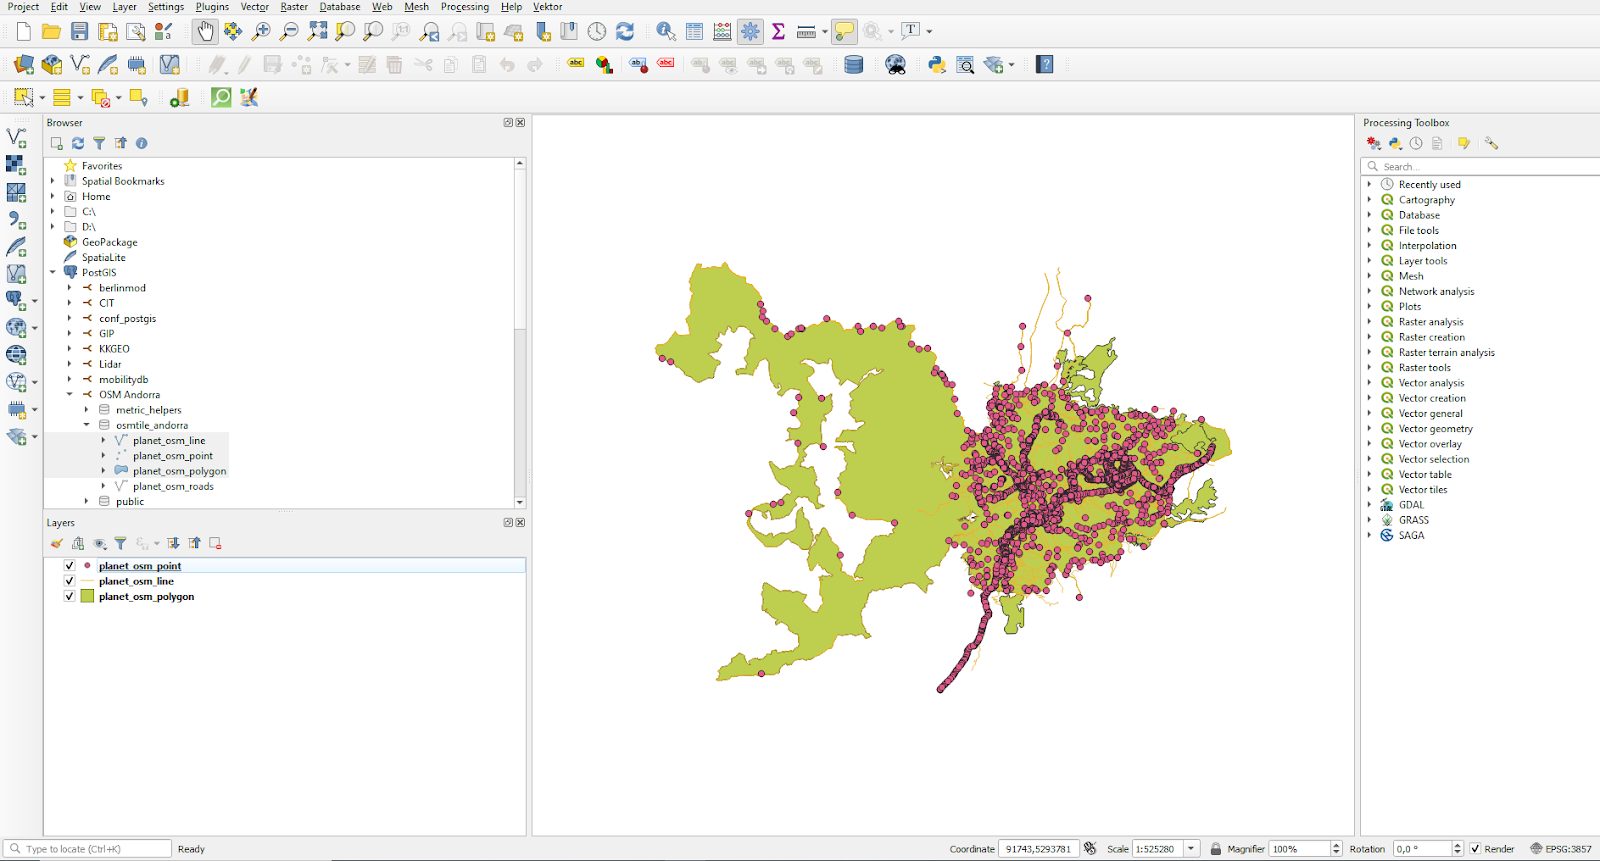
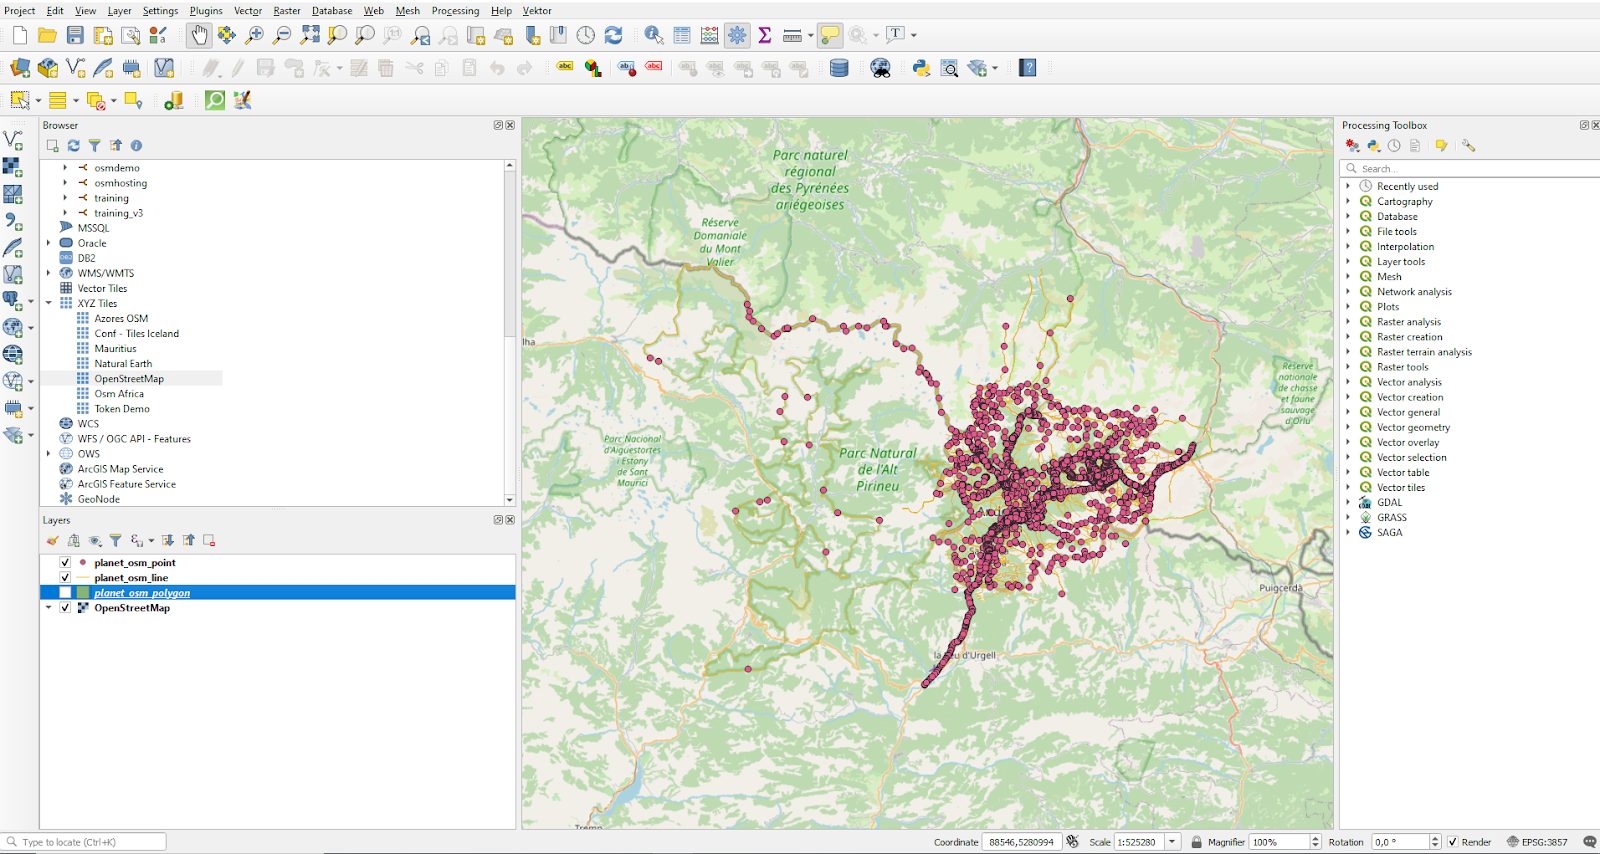
Voilà, you have visualized your first OSM data set. As you can see, the process only takes a couple of minutes. However, QGIS offers a lot more. You can create all kinds of fancy maps, and even edit your data. Speedy and practical!
For a tutorial on using PostGIS to calculate optimized trip costs, see Florian Nadler’s post on the Traveling Salesman Problem.
PostgreSQL provides a highly sophisticated and powerful security and permission system. It allows you to define users (= roles), groups and so on. However, without a graphical user interface, it is usually a bit tricky to figure out which role is assigned to whom. The following blog post explains how this can be done. Learn how to retrieve information on roles and role membership in PostgreSQL.
To show how users can be analyzed, we first create a couple of users and roles:
|
1 2 3 4 5 6 |
CREATE USER a; CREATE USER b; CREATE ROLE c LOGIN; CREATE ROLE d LOGIN; CREATE ROLE e LOGIN; CREATE ROLE f LOGIN; |
The important thing to note here is that “users” and “roles” are basically the same thing. The main difference is that a role is always NOLOGIN while a “user” is LOGIN. However, if you want a role to be able to log in, you can simply mark it as login. Otherwise, there is no difference. Behind the scenes, roles and users are all the same.
We can now assign roles to other roles (= users), using simple GRANT statements:
|
1 2 3 4 |
GRANT c TO a; GRANT d TO c; GRANT e TO c; GRANT f TO d; |
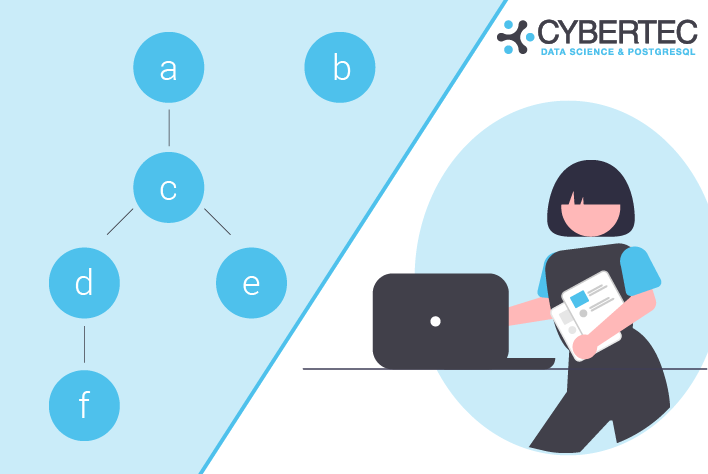
The goal is now to figure out how roles are nested and which role is assigned to which other role. Before we take a look at the final query, it makes sense to check out the system catalog and understand how data is stored. Let’s look at the roles first:
|
1 2 3 4 5 6 7 8 9 10 11 12 |
test=# SELECT oid, rolname, rolcanlogin FROM pg_authid WHERE oid > 16384; oid | rolname | rolcanlogin ---------+---------+------------- 1098572 | a | t 1098573 | b | t 1098574 | c | t 1098575 | d | t 1098576 | e | t 1098577 | f | t (6 rows) |
pg_authid contains a list of all roles, as well as some additional information (can log in, is superuser yes / no, etc.). What is noteworthy here is that each user has an internal number (= object id) which identifies the role.
The second important system table here is pg_auth_members. It basically knows which role is assigned to which other role. It is a simple role / member list which contains object ids to identify our users. The following query shows what my system table contains:
|
1 2 3 4 5 6 7 8 9 10 |
test=# SELECT * FROM pg_auth_members WHERE roleid > 16384; roleid | member | grantor | admin_option ---------+---------+---------+-------------- 1098574 | 1098572 | 10 | f 1098575 | 1098574 | 10 | f 1098576 | 1098574 | 10 | f 1098577 | 1098575 | 10 | f (4 rows) |
In PostgreSQL, all object ids below 16384 are reserved for system objects. Therefore I have excluded those, because we are only interested in users we have created on our own. Making the system catalog more readable requires a bit of joining, as you will see in the next section.
In PostgreSQL, roles / users can be nested. Nesting can be infinitely deep, which is why it is necessary to write a recursion, see below:
|
1 2 3 4 5 6 7 8 9 10 11 12 13 14 15 16 17 18 19 20 21 22 23 24 25 26 27 28 |
test=# WITH RECURSIVE x AS ( SELECT member::regrole, roleid::regrole AS role, member::regrole || ' -> ' || roleid::regrole AS path FROM pg_auth_members AS m WHERE roleid > 16384 UNION ALL SELECT x.member::regrole, m.roleid::regrole, x.path || ' -> ' || m.roleid::regrole FROM pg_auth_members AS m JOIN x ON m.member = x.role ) SELECT member, role, path FROM x ORDER BY member::text, role::text; member | role | path --------+------+------------------ a | c | a -> c a | d | a -> c -> d a | e | a -> c -> e a | f | a -> c -> d -> f c | d | c -> d c | e | c -> e c | f | c -> d -> f d | f | d -> f (8 rows) |
The query shows a list of all roles and how they are nested. The trick is mostly the “regrole” data type which allows us to cast an object ID directly to a username so that we can read it more easily. No additional joins are needed to resolve the ID.
If you are interested in security in general, I would like to recommend “PostgreSQL TDE” which is a more secure version of PostgreSQL capable of encrypting data on disk. It can be downloaded from our website.
In order to receive regular updates on important changes in PostgreSQL, subscribe to our newsletter, or follow us on Facebook or LinkedIn.